Someday I plan to do a tasting menu of all of the food Eli had to eat for this program. Some are things we’ve heard of but never had to eat in volume, like chia and poppy seeds, while others feel wilder and strange, like mare’s milk and quail egg (in the future, donkey’s milk, duck eggs, and more).
For this cycle of the program, Eli will be dosing with cooked quail egg yolk. Eggs are an interesting allergen in that you can be allergic to the yolk or the white, or in Eli’s case, to both. I think you can imagine with me that separating out the yolk and whites is pretty hard, but for this program, that is exactly what we did. They have videos and instructions we followed, but I thought it would be fun to share with you our process as we did this for the first time. Adam is a very involved dad and we did this one together. There is an added level of comfort and safety when we do things together, and even more so with something this important, I am always so glad I married Adam (he is patient, kind, and always coming up with better ways to do things!).
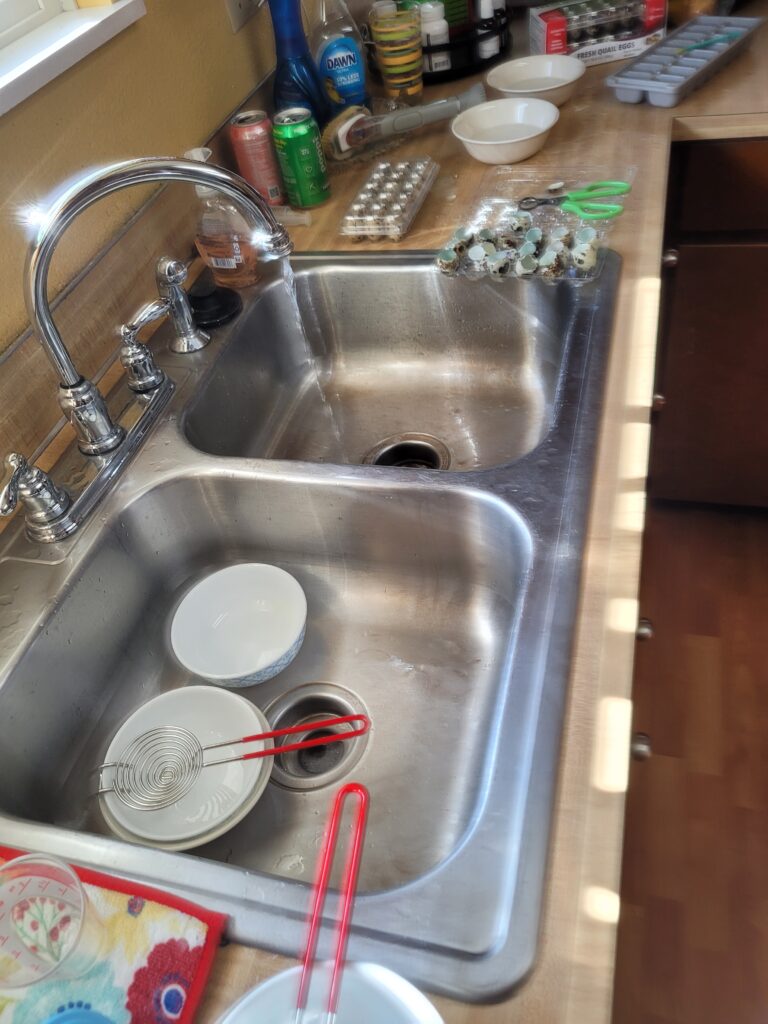
We are lucky that our Costco carries quail eggs, and just by chance, they were on sale. I bought two packs with no real idea of how many doses that would produce.

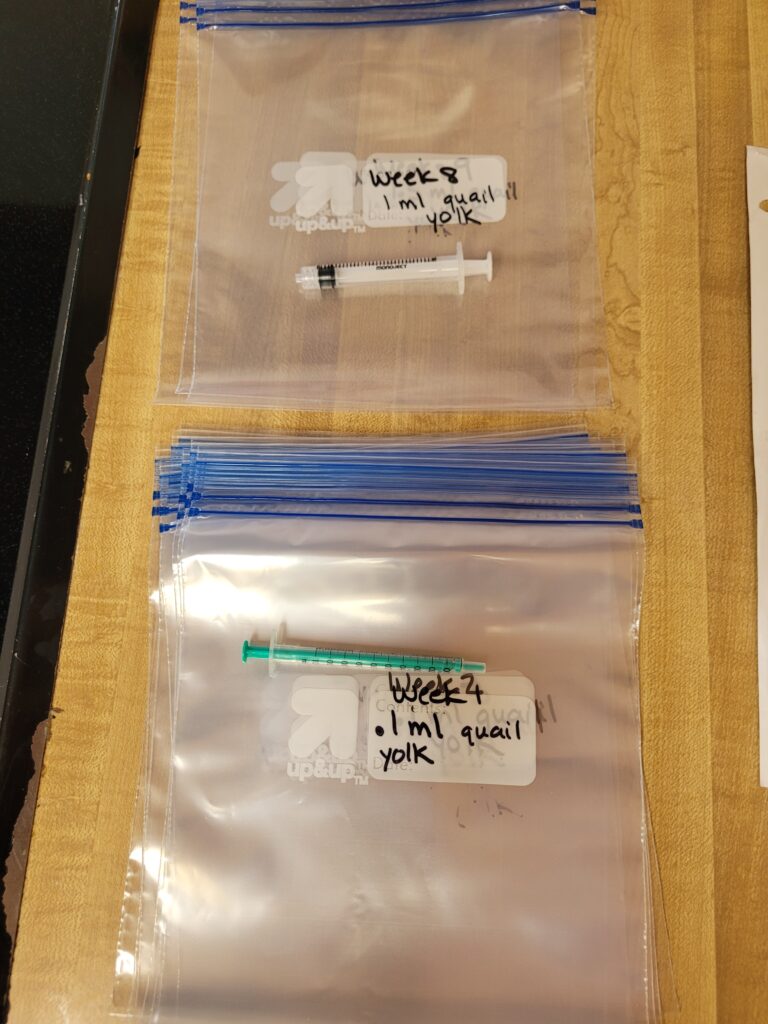
Each week has a different dosing amount and they start out very very small. Before we even started with the eggs, I labeled each bag with the week and the dose, although we ended up needing a small container to put them in because they doses are just SO small. Eli has had the strongest reactions to (hen) eggs and that is what all of the testing showed as well, this will be the allergen that takes the longest to get through, it begins now and hen’s egg will be the very last thing he challenges, 3 or 4 years from now.
We were warned that the process is frustrating and the yolks break often so you end up scrapping a lot of the egg. They were not wrong. Despite the small doses, we used up almost every single egg from the two (Costco sized) cartons I bought.
The process goes like this:
- You can tap the egg with a knife to open, but I bought and used scissors that were specifically for this purpose (super easy to use!).
- Next, you hold the yolk in your hands, switching it back and forth and removing as much egg white as you can. This part was crazy making for me as often the yolk would break as I tried to separate the white, and as soon as any white mixes with the yolk, it is unusable for the program.
- Then, you run water on your hands (not directly on the yolk, or it breaks) and continue to wash off the yolk.
- I got to where I could tell when all that was left was the yolk and the thin outer layer holding it together, at this point you drop it in a bowl of warm water for two minutes.
- After two minutes, we would put them individually in the sections of an ice cube tray.
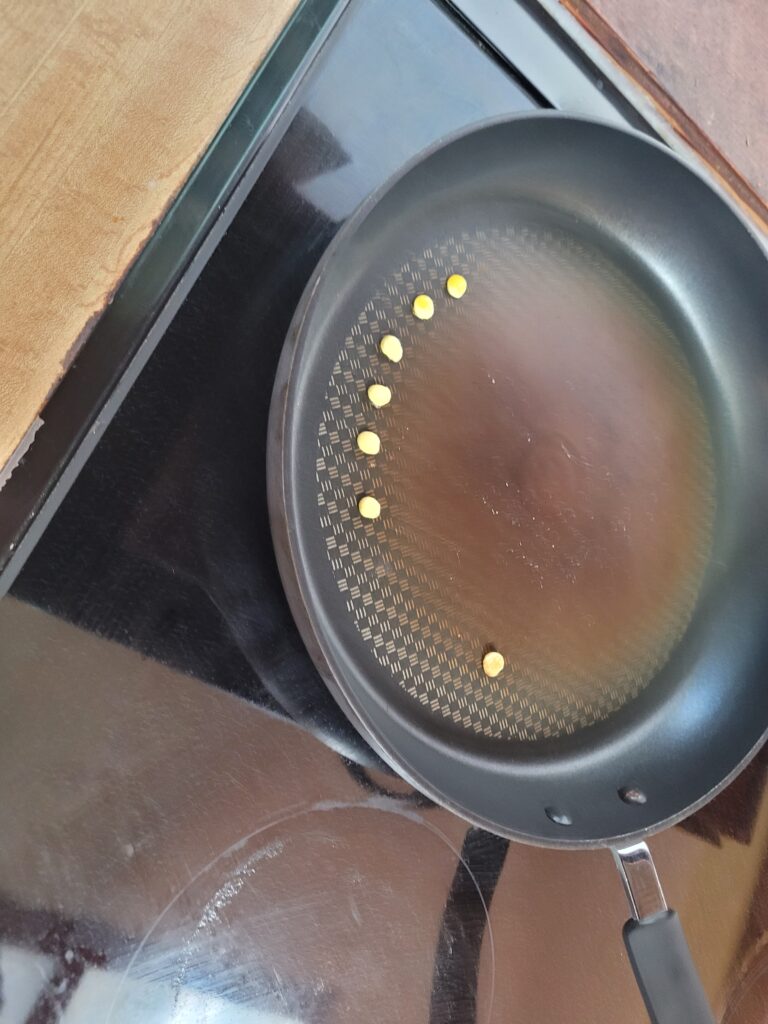
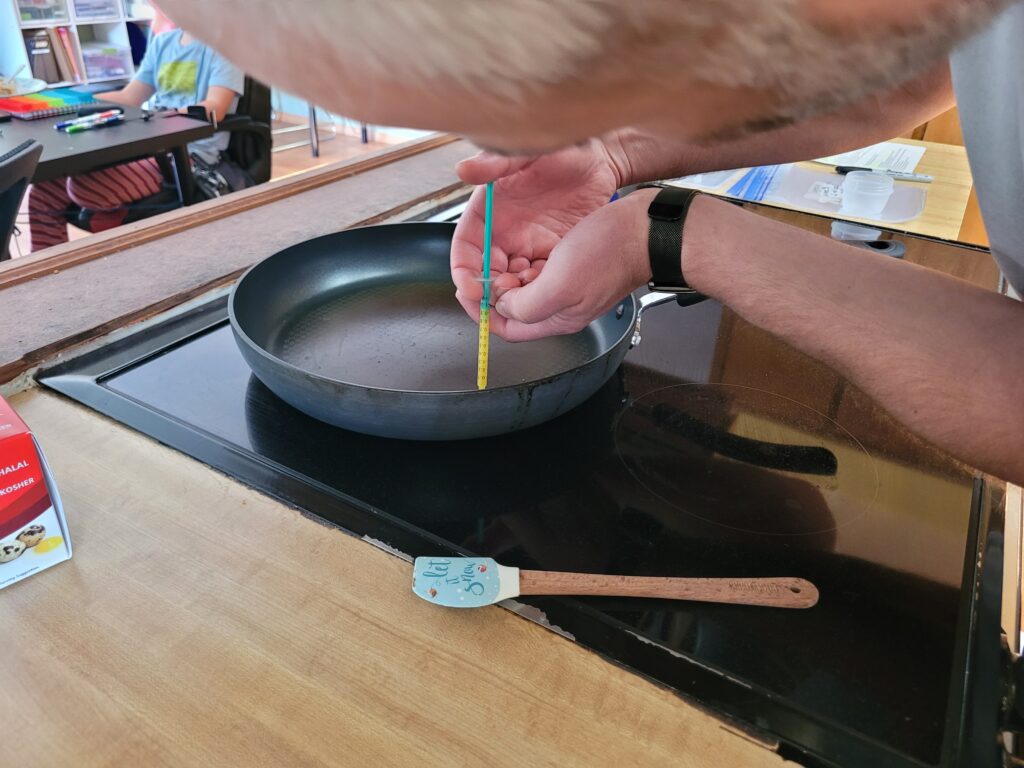
- I did the above steps while Adam did the following steps in what I only hope fulfilled his childhood dream of becoming a scientist. He painstakingly used a syringe to extract exact dosing amounts from the yolk itself. It is a one time shot, as once the yolk is broken, it can’t be used for dosing (we save all of this and made a scramble for Adam, Steven, and I to try after).
- Then, he cooked them in a frying pan. Most so small you couldn’t really flip them.

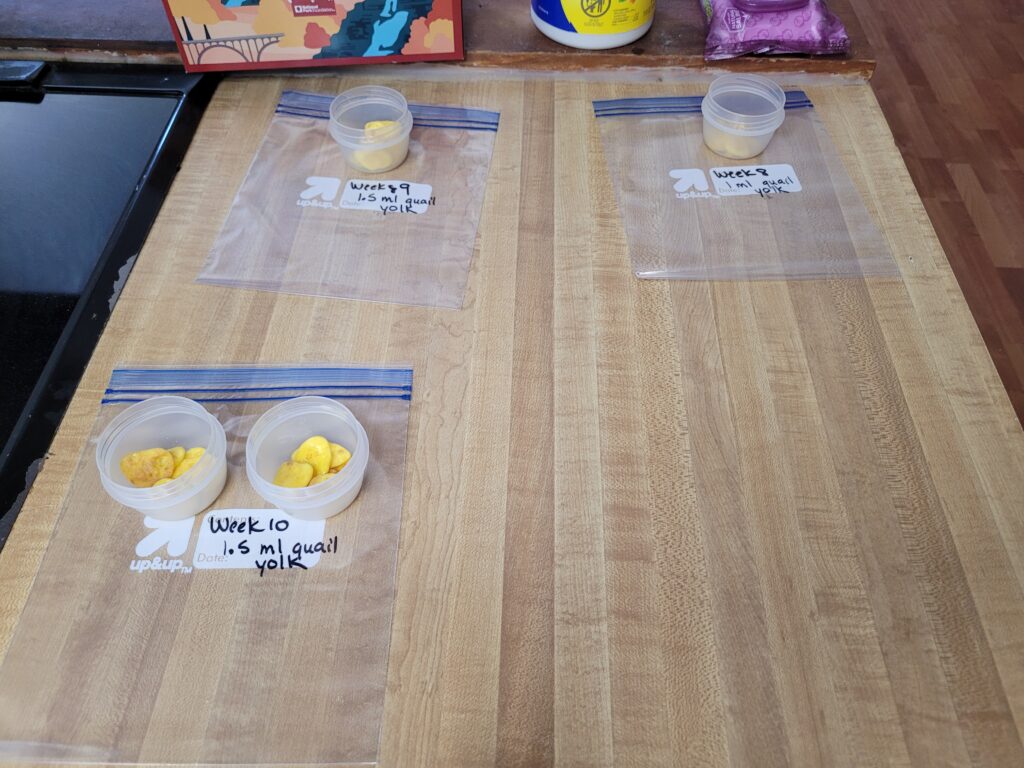
It was a strange experience, but we did it! Two and a half hours together in the kitchen, lots of clean and sanitizing in our kitchen, but we’re now ready for 10 weeks of dosing! We make the whole cycle at once, label them, and keep them in our deep freeze, which also holds frozen mare’s milk for maintenance and his morning maintenance muffins which I make every three weeks or so.
You and Adam are so amazing and such inspiration for so many with special.children in their family. Thank you for sharing.